

We may earn a commission when you buy through links on this page, at no extra cost to you. It never decides what we recommend. How we make money
Knowing how to test a car battery with a multimeter takes about five minutes, and it tells you more than most people expect: whether the battery is charged, whether it holds up when the starter pulls on it, and whether the alternator is putting charge back in. What it cannot tell you is how much life the battery has left, and guides that skip that part send people to buy batteries they don’t need, or to keep one that is about to quit.
This guide is for US drivers and DIYers dealing with a slow crank, a car that sat for weeks, or a battery light on the dash. We compared the testing steps from Fluke, the meter maker, with Interstate Batteries’ guide, OPTIMA’s advice on reading voltage and the test charts in a Clore Automotive load tester manual, then lined up where they agree and where they don’t. You will learn the right meter setting, the five steps, what each reading means and how three quick readings point to the battery, the starter or the alternator.
How to test a car battery with a multimeter
- Let it rest Turn the engine and every accessory off. If you just drove or charged, wait several hours, or run the headlights for 30 seconds to 2 minutes to clear surface charge.
- Set the meter Turn the dial to DC volts (a V with a straight line). Pick the 20V range if your meter is not auto-ranging.
- Connect Red probe to the positive (+) post, black probe to the negative (−) post.
- Read it About 12.6V is full, 12.4V is about 75%, 12.2V is about 50% and below 12.0V is discharged.
- Check under load Watch the lowest reading while the engine cranks (Clore flags anything under 9.5V), then read it with the engine running (Fluke: 13.7 to 14.7V).
What you need before you start
A basic digital multimeter is enough for every test in this guide. You will also want a few things within reach:
- A digital multimeter with a DC volts setting. One with a MIN/MAX button makes the cranking test easier, because it holds the lowest reading for you. Fluke recommends MIN/MAX for catching the voltage drop at startup.
- Safety glasses and gloves. Fluke warns that lead-acid batteries can give off explosive gas and contain acid.
- A wire brush or terminal cleaner if the posts are crusty. Fluke says to check the terminals for corrosion or looseness before you measure.
- A helper for the cranking and engine-running checks, so you can watch the meter while someone else turns the key.
The five-step multimeter battery test
These steps follow the order Fluke and Interstate use. Steps 1 to 4 give you the resting voltage, which tells you how charged the battery is. Step 5 shows how it behaves when it has to work.
Step 1: Turn everything off and find the terminals
Park, shut the engine off and switch off the lights, radio and climate control. Fluke says to turn off all accessories before a resting voltage reading, because any load pulls the number down. Open the hood and find the battery. Interstate notes that the positive terminal is usually red with a plus sign and the negative is usually black with a minus sign. OPTIMA says the most accurate reading comes straight from the battery terminals, not from a dash gauge.
Step 2: Clear the surface charge
Right after a drive or a charge, a battery shows a voltage higher than its true state of charge. Skip this step and a tired battery can look healthy. The simplest fix is time: OPTIMA suggests letting the battery sit 12 to 24 hours. If you can’t wait, turn the headlights on with the engine off for 30 seconds to 2 minutes, switch them off and give the battery a few minutes before you measure. The surface charge section explains why the sources give different times.
Step 3: Set the multimeter to DC volts
Plug the black lead into the COM jack and the red lead into the jack marked V (often V/Ω), as Fluke’s battery guide describes. Turn the dial to DC volts. That symbol is a V with a straight line, often with a dashed line beside it. The V with a wavy line is AC volts and gives a meaningless number on a car battery. If your meter makes you choose a range, pick 20V DC, the range Interstate’s guide uses. An auto-ranging meter chooses for you.
Step 4: Connect the probes and read the voltage
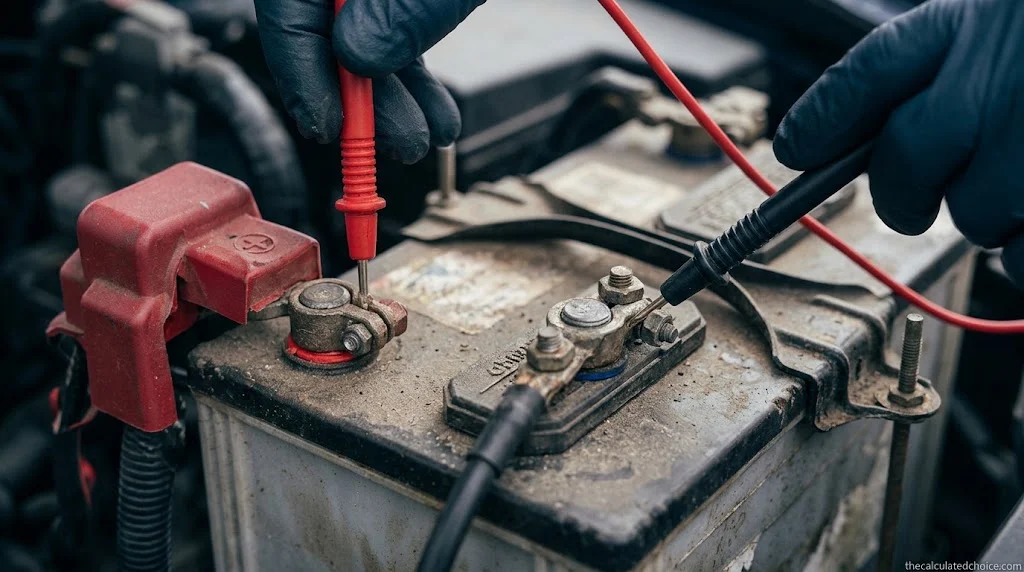
Touch the red probe to the positive post or its clamp and the black probe to the negative. Press firmly on clean, bare metal. Read the display once the number settles, and write it down. If you see a minus sign in front of the number, the probes are reversed; swap them and read again. A reading near 12.6 volts means a full battery. The table below shows what lower readings mean.
Step 5: Check it under load
Resting voltage only tells you how full the battery is. To see how it performs, take two more readings with a helper: one while the engine cranks and one with the engine running. Both are covered below, and together with the resting reading they make up the three-reading diagnosis.
Surface charge: why a fresh reading can fool you
Every source we checked agrees that surface charge inflates a fresh reading. They disagree on how to get rid of it:
| Source | How to remove surface charge | Then |
|---|---|---|
| OPTIMA | Let the battery sit 12 to 24 hours, or run the headlights (engine off) for 30 seconds | Measure |
| Fluke | Run the headlights for about 1 minute if the vehicle was just running | Turn them off and measure |
| Interstate Batteries | Run the headlights for about 2 minutes | Turn them off and connect the meter |
| Clore 1874 load tester manual | If the reading is above 12.8V: high beams for 3 to 5 seconds, or crank with the ignition disabled for 10 to 15 seconds | Let the battery stand 10 minutes |
Our take: the methods agree on the idea and differ mainly in how cautious they are. If you have time, an overnight rest gives the cleanest number. If you don’t, a short headlight load followed by a few minutes’ wait gets you close. Clore’s manual adds a handy clue for standard flooded batteries: a resting reading above 12.8 volts usually means surface charge is still there. That clue does not hold for every AGM battery, because OPTIMA says its YELLOWTOP and most BLUETOP batteries read about 13.0 to 13.2 volts when fully charged.
What your multimeter reading means
These state-of-charge numbers come from the open-circuit voltage chart in Clore’s 1874 load tester manual, and they match Fluke’s guide. They assume a 12-volt flooded lead-acid battery that has rested.
| Resting voltage | Approx. state of charge | What to do |
|---|---|---|
| 12.6V or more | 100% | Charged. If it still cranks slowly, do the cranking test. |
| 12.4V | 75% | Top it up. Clore wants at least 12.4V before any load test. |
| 12.2V | 50% | Charge it soon. |
| 12.0V | 25% | Charge it now. |
| 11.8V or less | 0% | Fully discharged. Charge it, then retest. |
If a battery will not come back to at least 12.4 volts after a full charge, Clore’s manual says to replace it. AGM batteries can rest a little higher: OPTIMA lists about 12.6 to 12.8 volts for a fully charged REDTOP and 13.0 to 13.2 volts for YELLOWTOP. Our car battery voltage chart covers every reading in more detail, including cranking, engine-running and cold-weather numbers.
If your reading says the battery needs charging, our guide on how to choose a car battery charger explains how to match a charger to your battery.
How to test the battery while cranking
This is the closest a multimeter gets to a load test. Keep the probes on the posts, turn on MIN/MAX if your meter has it, and have a helper start the engine while you watch for the lowest number. Fluke suggests MIN/MAX for exactly this, because the dip lasts only a moment.
Clore’s load tester manual draws the line for 12-volt vehicles at 9.5 volts. Below that, it points to excessive current draw, which can come from a failing battery, bad battery or starter connections, a failing starter, or a battery that is too small for the vehicle. Clore’s own starter test cranks the engine with the ignition disabled so it does not start; if you want to do it that way, follow your vehicle’s service manual for disabling it.
Test car battery with multimeter while running
With the engine running at idle, take one more reading at the battery posts. Now you are measuring the charging system, not the battery. Fluke says a good alternator should produce 13.7 to 14.7 volts under normal conditions. Interstate’s guide uses a simpler line: you want more than 13 volts, and below 13 you could have a bad alternator or a bad battery.
Readings between 13.0 and 13.7 volts are the gray zone where those two sources differ. Treat them as a reason to have the charging system tested at a parts store or shop, not as proof of a bad alternator. Interstate also links a rotten-egg smell to overcharging, so if you smell it with the engine running, shut it off and have the system checked.
How accurate does your multimeter need to be?
This is the part most guides skip. On the chart above, the gap between a full battery and a 75% battery is only 0.2 volts, so your meter’s own error can blur the answer. Here is the math for one well-known meter:
Meter error at a 12.6V reading
Example meter: Fluke 101, DC accuracy 0.5% + 3 digits, 0.01V resolution on its 60V range0.5% × 12.60V = 0.063V3 digits × 0.01V = 0.03VPossible error: about ±0.09VOne chart step (12.6V to 12.4V) = 0.2V ≈ 25% state of chargeSo ±0.09V is roughly ±11% state of charge. A display that says 12.50V really means somewhere between about 12.41V and 12.59V: anywhere from three-quarters full to nearly full. The Fluke 101 figures come from Fluke’s published specifications.
What this means in practice: don’t decide a battery’s fate on a 0.1-volt difference. Use the same meter each time, compare readings over a few days, and confirm a borderline battery with a load or conductance test. Meters differ, so look up the DC volts accuracy in your own meter’s manual and run the same math.
The three-reading diagnosis: battery, starter or alternator?
Put the resting, cranking and running readings together and you can usually tell which part to look at first. We built this table from the thresholds above. It is a guide to what to check next, not a replacement for a shop test. If you are still at the symptom stage, our guide to the signs of a bad car battery shows which reading to take for each one.
| Resting (engine off) | Lowest while cranking | Engine running | Most likely | Next step |
|---|---|---|---|---|
| 12.4V or more | 9.5V or more | 13.7 to 14.7V | Battery and charging system look healthy | If the battery keeps going flat, test for parasitic drain |
| Below 12.4V | Any | 13.7 to 14.7V | Battery is discharged; the alternator is charging | Charge it fully and retest; replace it if it will not reach 12.4V |
| 12.4V or more | Below 9.5V | 13.7 to 14.7V | Weak battery under load, poor connections or a starter drawing too much | Clean and tighten the terminals, then get a load or conductance test |
| Any | Any | Below 13V | Charging system problem, or a battery that will not accept charge | Have the alternator and battery tested |
| Full after charging, low again within days | Any | 13.7 to 14.7V | Something drains it while parked, or the battery cannot hold charge | Do the drain test below, then test the battery |
Can you test car battery amps with a multimeter?
Not the amps most people mean. Cold cranking amps (CCA), the number on the battery label, describes how much current the battery can deliver to a starter in the cold. A handheld meter’s amp input is built for small currents, such as the 10A jack Fluke uses in its drain test, far below what a starter pulls. Checking a battery against its CCA rating takes a battery tester.
What a multimeter can measure is parasitic drain, the small current a car pulls while it is parked. Our guide on why a car battery keeps dying shows how big a drain has to be to flatten a battery overnight. Fluke’s method, in brief:
- Turn everything off, close the doors and let the car sit 10 to 45 minutes so its modules go to sleep.
- With the black lead in COM, the red lead in the 10A jack and the dial on DC amps, disconnect the negative battery cable and connect the meter in series: red lead to the battery post, black lead to the cable you removed.
- Read the current. Fluke calls under 50 mA normal and over 100 mA suspect. Once the current drops below 400 mA, Fluke suggests moving to the mA jack for a finer reading.
- If the draw is high, pull fuses one at a time until the current drops. That points to the circuit causing the drain.
When a multimeter isn’t enough
A multimeter answers “Is it charged?” well and “Is it healthy?” only in part. A battery can show a good resting voltage and still sag under the starter’s load, because voltage reflects charge, not how much capacity is left. Interstate makes the same point: a resting voltage of around 12.5 volts on its own does not prove the battery is good, and it recommends a shop’s advanced test to decide whether to recharge or replace.
That is the job of a dedicated battery tester, and it is the last step in learning how to test a car battery with a multimeter: knowing when to hand the job to a better tool. If you test batteries often or keep more than one vehicle, our guide to the best car battery tester compares the types and the picks that passed our checks. If the battery is simply flat and you need to get moving, our guide on how to use a jump starter walks through it safely. And for a car that sits for weeks, see battery maintainer vs trickle charger to keep the battery topped up between drives.
Multimeter battery test: myth vs fact
| Myth | Fact |
|---|---|
| 12 volts means the battery is fine. | On the chart, 12.0V is only about 25% charged. A full 12-volt battery rests near 12.6V. |
| A good voltage reading means a good battery. | Voltage shows charge, not remaining capacity. Interstate says resting voltage alone does not confirm a good battery. |
| Test right after driving for the best reading. | That is when surface charge inflates the number. Rest the battery or clear the charge first. |
| The engine-running reading tests the battery. | With the engine running, you are reading the alternator’s output. Fluke’s healthy range is 13.7 to 14.7V. |
| You can check CCA with a multimeter. | A multimeter’s amp input is far too small. Checking CCA takes a load or conductance tester. |
| Every full battery reads exactly 12.6V. | OPTIMA says to treat readings as a range: about 12.6 to 12.8V for REDTOP and 13.0 to 13.2V for YELLOWTOP. |
Frequently asked questions
What setting should my multimeter be on to test a car battery?
What should a 12-volt car battery read on a multimeter?
How do I tell if my car battery is bad with a multimeter?
Can you test a car battery with a multimeter while the engine is running?
Why does my battery read 12.6 volts but the car won’t start?
How do I know if my car battery needs replacing?
Can you test car battery amps with a multimeter?
How we researched this guide
We compared the battery-testing steps published by Fluke and Interstate Batteries with OPTIMA’s guidance on reading voltage and the test charts in Clore Automotive’s 1874 load tester manual. Where the sources disagree, as they do on surface charge and charging voltage, we show each one instead of picking a number for you. The meter-accuracy math uses the Fluke 101’s published DC specification as an example, and the three-reading diagnosis table and myth-vs-fact list are our own summary of those thresholds. We did not hands-on test any battery or meter for this article, and no brand paid for or reviewed it.
Sources: Fluke battery voltage guide · Fluke parasitic drain guide · Interstate Batteries test guide · OPTIMA voltage guide · Clore 1874 load tester manual · Fluke 101 specifications

Researched by Shahzad
Amazon seller who researches products using sales-rank history, price tracking and owner reviews before recommending anything. Read our disclosure.