
We may earn a commission when you buy through links on this page, at no extra cost to you. It never decides what we recommend. How we make money
Knowing how to use a jump starter safely takes about two minutes to learn, and it is worth learning before the morning you need it. Portable packs are much safer than they used to be — most block sparks and warn you about reversed clamps — but those protections only work if you follow the right order. This guide walks through each step using the instructions manufacturers such as NOCO and Clore publish in their own manuals, plus the mistakes that cause most failed jump starts.
How to use a jump starter: the quick version
- Prepare Turn the car and every accessory off. Check the battery is not cracked, leaking, bulging or frozen.
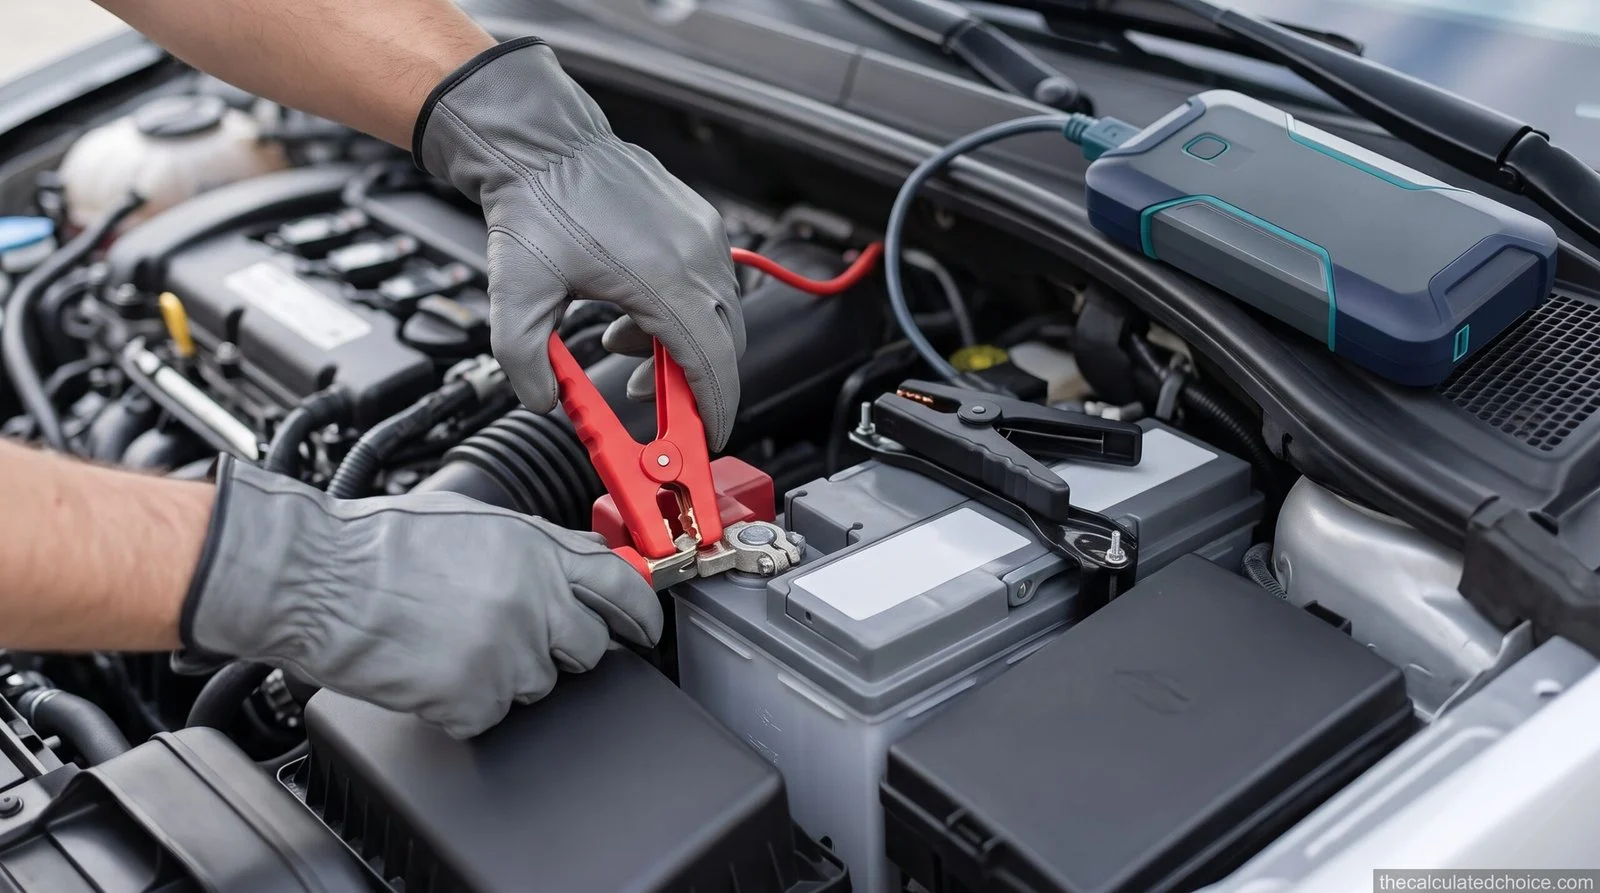
- Connect Red clamp to the positive (+) terminal first, then black clamp to negative (−) or bare metal ground, as your pack’s manual says.
- Power on Switch the pack on and wait for the ready light. A warning light usually means the clamps are reversed.
- Start Crank the engine. If it does not start, wait 20–30 seconds before trying again.
- Disconnect Turn the pack off, remove the black clamp, then the red. Recharge the pack.
Before you start: safety checks
Before you learn how to use a jump starter, check the battery itself. Most jump-start accidents start with a battery that should never have been jumped. Take thirty seconds to look before you connect anything:
- Inspect the battery. Do not jump a battery that is cracked, leaking, bulging or visibly corroded around the case. Lead-acid batteries can release flammable hydrogen gas, so keep flames and cigarettes away.
- Never jump a frozen battery. NOCO and Clore both warn against charging or jump starting a frozen battery. If the case looks swollen or you can see ice, stop and call for help.
- Check the voltage and battery type. Most consumer packs are for 12-volt systems only. Some, including the NOCO GB40, are rated for 12-volt lead-acid batteries only — check your manual before using one on a lithium starter battery. Riders can see which packs allow lithium motorcycle batteries in our best motorcycle jump starter guide.
- Check your vehicle’s manual. Many modern cars have remote jump-start points under the hood, especially when the battery sits in the trunk or under a seat. Use them if they exist.
- Make sure the pack is charged. A half-empty pack is the most common reason a jump start fails, especially in winter.
How to use a jump starter safely: step by step
1. Turn everything off
The first rule of how to use a jump starter safely: switch off the ignition, then turn off headlights, the radio, heater fan and A/C. NOCO’s instructions specifically ask you to turn off all power loads before jump starting, because accessories pull current away from the starter motor. Put the car in Park (or neutral with the parking brake on for a manual).
2. Keep the pack switched off while you connect
Most jump starter instructions agree on this: leave the jump starter off, or in standby, until both clamps are attached. Hold the clamps apart so they never touch each other — even on packs with spark protection, it is a habit worth keeping.
3. Connect the red clamp to the positive terminal
Find the positive terminal, usually marked with a + and often covered by a red cap. Attach the red clamp firmly to the metal terminal itself, not the plastic cover. Wiggle it slightly so the teeth bite through any corrosion; a poor connection is one of the main reasons a jump start fails.
4. Connect the black clamp to negative or ground
Attach the black clamp to the negative (−) terminal or to a solid, unpainted metal point on the engine block or chassis, following your pack’s manual. Grounding away from the battery is the traditional advice because any spark happens away from battery gases. Avoid painted surfaces, fuel lines and moving parts such as belts and fans. Following this order is also what keeps the car’s electronics safe; we explain the real risks in can a jump starter damage your car.
5. Turn the pack on and check the lights
Switch the jump starter on. Most packs show a ready or boost light when the connection is correct. If a red error light comes on, the clamps are usually reversed: switch the pack off, swap the clamps, and try again. NOCO’s manual describes exactly this — reverse the connections to clear the error, then the boost light illuminates. If you see a different light or hear beeping, our jump starter error light guide decodes each signal by brand.
6. Start the engine
Get in and start the car normally. Most vehicles fire immediately. NOCO notes that some vehicles may need the pack connected for up to 30 seconds first, and that if the car does not start right away you should wait 20–30 seconds before trying again. Do not hold the key in the start position for long stretches; short attempts protect both the starter motor and the pack.
7. Disconnect in reverse order
This is the part of jump starter instructions people rush. Once the engine is running, turn the jump starter off, remove the black clamp, then remove the red clamp. Keep the clamps apart as you pull them away and close the hood.
8. Recharge the jump starter
Plug the pack in as soon as you can. Recharging is the step most jump starter instructions mention last, but it decides whether the pack works next time. Lithium packs slowly lose charge while stored, so many manufacturers recommend checking the charge every few months — TOPDON, for example, suggests every two months. A pack that is always full is the difference between a two-minute fix and a tow truck. If the pack will not take a charge, see why a jump starter won’t charge for the usual causes and fixes.
Manual override mode: use with care
Many packs refuse to start boosting if the car battery is almost completely flat, because they cannot detect it. Manual override (sometimes called force start or boost mode) forces power to the clamps anyway. That is useful, but it comes with a real trade-off: NOCO’s GB40 manual states that in override mode both the spark-proof and reverse polarity protections are disabled, and that the mode is for 12-volt lead-acid batteries only.
Only use override after you have double-checked that red is on positive and black is on negative or ground, and only when the normal mode will not detect the battery. Do not rest your hands on the clamps while it is active.
Using a jump starter in cold weather
Knowing how to use a portable jump starter in winter matters, because cold makes every part of a jump start harder: AAA reports that a car battery loses about 35% of its strength at 32°F and about 60% at 0°F. Your jump starter also has a minimum operating temperature, which ranges from about 14°F on some popular lithium packs to −40°F on supercapacitor units. Rain brings different rules than cold; see can you jump start a car in the rain.
Three habits help. Keep the pack in the cabin or bring it indoors instead of leaving it in a frozen trunk. Give each attempt a few seconds more rest in between. And if the first attempt fails in deep cold, Clore’s manual notes that a second or third attempt can warm the pack’s internal battery and improve the odds. If you live somewhere with hard winters, our guide to the best jump starter for cold weather compares packs by their published temperature ratings.
Common mistakes that cause failed jump starts
| Mistake | What happens | What to do instead |
|---|---|---|
| Pack not fully charged | Not enough power, especially in cold weather | Recharge after every use and every few months in storage |
| Clamps on the plastic cover or corrosion | Weak connection, pack may not detect the battery | Clamp bare metal and wiggle the clamp to bite in |
| Accessories left on | Current drawn away from the starter | Turn off lights, fan, radio and A/C first |
| Cranking for a long time | Overheats the starter and drains the pack | Short attempts with 20–30 seconds rest between |
| Using override as the default | Removes spark and reverse polarity protection | Use normal mode first; override only when needed |
| Pack too small for the engine | Engine turns slowly or not at all | Match the pack’s engine rating to your engine |
That last one is more common than it sounds. If your pack struggles every time, check its engine rating with our jump starter size calculator, and see peak amps vs cranking amps for why a big number on the box does not guarantee enough power. If you are still shopping, our best jump starter under $100 picks cover most cars and SUVs.
After the jump start: what to do next
Learning how to use a jump starter pack only solves half the problem. A jump starter gets the engine running; it does not recharge a dead battery. To bring a flat battery back to full, use a proper charger; our guide on how to choose a car battery charger explains which type you need. Drive for a while so the alternator can put charge back in, and avoid switching the engine off at the next stop if you can. If the car needs another jump the next morning, have the battery and charging system tested — many auto parts stores will do it free. A battery that keeps dying is usually worn out, or something is draining it overnight. If the car has an AGM or start-stop battery, recharge it with a charger that has a real AGM mode — our guide to the best battery charger for AGM batteries explains why, and our guide to what size battery charger you need helps you pick the right amps.
Still deciding what to keep in the car? Our comparison of jump starter vs jumper cables covers when a second car and a set of cables make more sense, and how to choose a jump starter walks through the specs that matter before you buy.
Frequently asked questions
Is it safe to use a jump starter?
Which clamp do you connect first on a jump starter?
How long should you leave a jump starter connected?
Will a jump starter work on a completely dead battery?
How many times can you try to jump start a car?
Do you need to charge a jump starter after every use?
How we wrote this guide
Every step and warning in this guide comes from manufacturer instructions, cross-checked between brands. Where brands differ, such as where to attach the black clamp, we tell you to follow your own pack’s manual.
Sources: NOCO — how to jump start using GB40 · NOCO GB40 user guide · Clore JNC305 operator’s manual · AAA on cold-weather batteries

Researched by Shahzad
Amazon seller who researches products using sales-rank history, price tracking and owner reviews before recommending anything. Read our disclosure.